If you’re ready to start assembling your wooden garden shed, here’s a handy guide to take you through each step. Whether you’re a seasoned DIYer or a beginner, these clear and easy-to-understand instructions will help make sure you experience a successful build.
Before you Begin
Inspect the kit.
Double-check the flat pack to make sure all parts are included and undamaged. A quick inspection now can save a lot of time and effort later, so take the time to make sure no surprises happen during assembly.
Refer to the detailed parts list for descriptions, dimensions, and quantities. Markings on the parts match those in the manual for easy identification.
If any parts are missing or defective, contact us for replacements.
If you’re not satisfied with the product, review our return policy.
Prepare your workspace
Once you’ve checked all the parts in your kit, place them all on a clean, dry surface to prevent staining, as untreated wood is very susceptible to stains.
Review the instructions
Familiarise yourself with the manual before starting; it provides step-by-step guidance with illustrations. We have written the instructions in easy-to-understand terms to avoid any misunderstandings that may lead to you or the product.
If you need professional help, don’t hesitate to seek it.
Follow the instructions carefully and in order. Skipping steps or using alternative methods can compromise the structure’s integrity.
Note: We are not liable for any damage or injuries if you fail to follow the instructions.
Tools You'll Need
Before you roll up your sleeves and start assembling your wooden garden house, first make sure you have all the necessary tools available. This will help make sure you have a smooth and efficient building process.
Work gloves
Multipurpose knife
Tape measure
Spirit level
Drill
Hammer
Rubber mallet
Stepladder.
Foundation
A solid foundation is crucial. Refer to our foundation guide for detailed instructions.
For smaller structures like sheds or gazebos, concrete tiles or thermal blocks can provide a lightweight yet sturdy base.
For larger buildings, consider solid slabs for greater stability and durability.
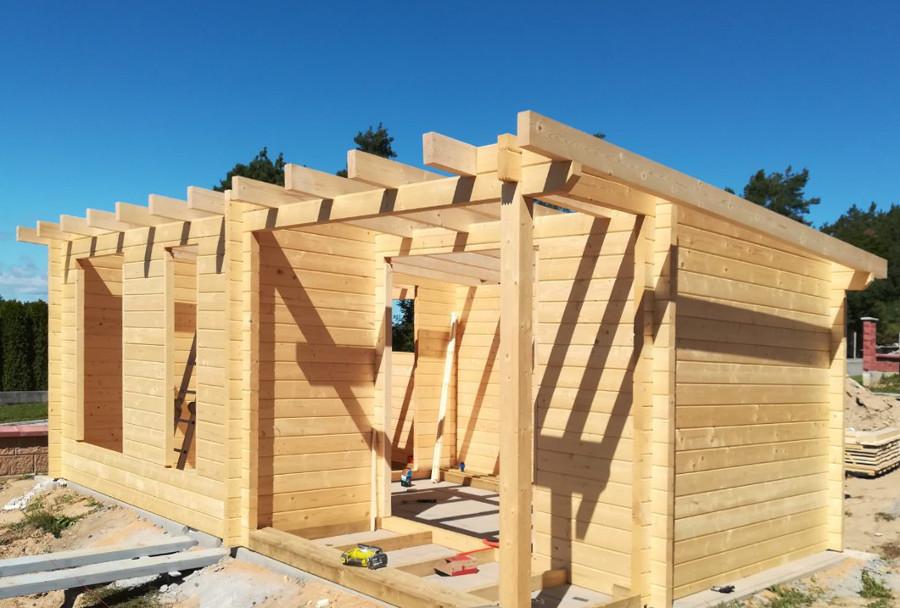
Assembly
Read the manual
Take the time to review the assembly instructions and make sure you understand each step.
The manual will give you clear guidance with helpful illustrations.
Contact our customer service team if you have any questions.
Follow the instructions
Follow the instructions exactly to achieve the best result.
Don’t skip steps or try alternative methods.
Prioritise safety by following all safety protocols.
Start with the structure, followed by the roof, and then install the windows and doors.
Roof Installation
Follow the instructions
Assemble the roof beams according to the instructions. The roof is one of the most important parts of your garden house and it’s essential to make sure it is assembled correctly.
A watertight roof is essential for the building’s longevity.
Consider a roof covering:
While some products come without a roof covering, we strongly recommend adding one for enhanced protection.
Choose a durable material that complements the building’s aesthetics.
Note: Wooden boards alone are not sufficient for adequate roof protection.
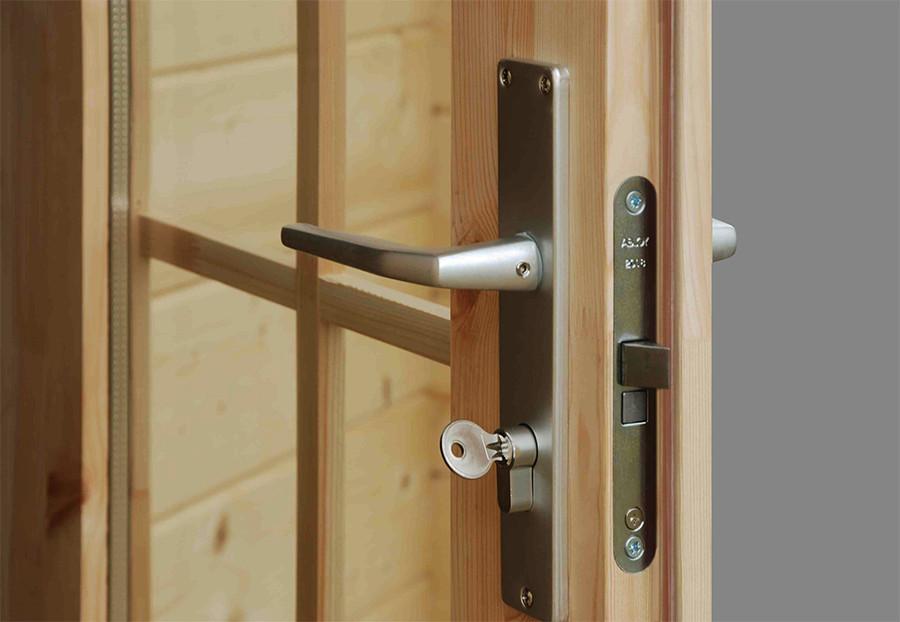
Window and Door Installation
Leave space for expansion:
Do not screw doors and windows directly into the construction frames, as wooden frames are designed to expand and contract, so leave room for movement. If you screw doors and windows directly into the frame, there is no room for the wood to expand, which may cause damage.
Attach doors and windows to the boards covering the frame for secure installation.
Refer to the instructions for detailed guidance.
Take your time when installing our products. Don’t screw the doors and windows into the construction frames as you’d usually do; instead, make sure you leave some space for natural movement.
Wood Treatment
Protect your investment:
Treat all untreated wood with paint or a high-quality preservative inside and outside within a week of installation and every year after that.
This is essential for maintaining the product’s appearance and ensures your anti-rot warranty remains valid.
Also treat door and window frames with preservative immediately after unpacking.
Follow the included maintenance instructions for heat-treated wood or painted products.
Enjoy Your New Wooden Garden House
By following these instructions, you’ll successfully assemble your wooden garden shed and enjoy it for years to come. If you have any questions along the way, get in touch with our customer service team.
Assembly manuals
Assembly Installation Service
Do you want to add a garden shed to your outdoor space without the hassle of DIY assembly? The Gardenhouse24 professional installation team can help.
We’ll handle every step of the process, from carefully laying the foundation to constructing the shed itself. You can sit back, relax, and watch your vision come to life, knowing that your new wooden garden shed will be built to the highest standards.
With our expertise and attention to detail, you can rest assured your shed will be sturdy, secure, and built to last. Let us take the stress out of the construction process and provide you with a hassle-free installation experience.
Our team will take two to ten working days to assemble a 30m2 garden house, and the installation cost will be about 30% to 50% of the house cost. Contact us for more information about our garden shed installation service.
For more detailed guidance, we’ve got you covered with our comprehensive assembly manuals. They will walk you through each step of the process.